Here on our January blog, we shared three important elements of good iPhone photos: Lighting, Editing, and Content. It was discussed that lighting is your most powerful tool. It is important to gauge the light in which your photo is being taken and adjust accordingly. Today we will share additional tips and details to utilize this important concept.
We will consider strictly outdoor circumstances, as this is when you have the least control over your lighting. The most common situations are harsh sunlight, cloudy skies, or sunset. All three of these can be used as opportunities to take high-quality photos.
Harsh Sunlight
Harsh sunlight provides great contrast for photos, but it sometimes causes too many shadows in the image, especially when photographing people. To avoid this, try finding some shade (a tree, overhang, etc.). This lighting, however, can be great for landscapes, as it provides vivid and bright colors for your image.
When there’s harsh sunlight and we need to shoot products for SDA, I alway shoot product photos in some shade outside of the office. See an example below.

You can also use the harsh sunlight to your advantage and really allow the bright colors and shadows to pop. Here’s a photo from Manhattan Beach.

Cloudy Skies
Cloudy weather is what most photographers would call the perfect light. It’s soft and even, allowing you to take the photo anywhere you’d like. It’s amazing light for portraits specifically.
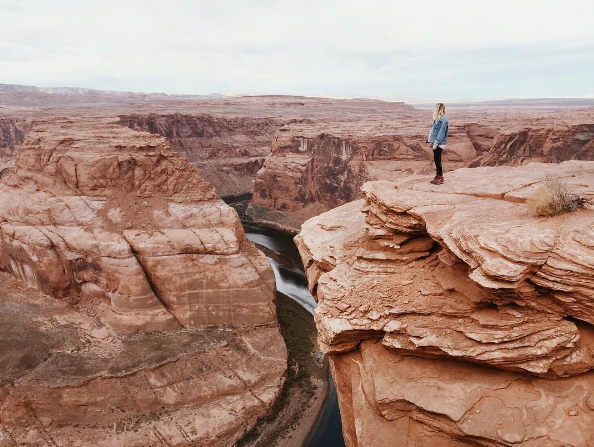
Here’s a photo from a cloudy day in Page, Arizona.
Sunset
During a sunset, it is key to place the subject in front of the sun and shoot towards the sun if you are looking to capture any lens flare or light halos around your subject. This could be the sun setting behind a mountain, or a photo of people on the beach with the sun setting behind them. Sunset lighting creates the most whimsical photos, but it is also the most difficult to master with a subject in the photo. The subject will often appear too dark with the sun beaming behind, so be sure to utilize an editing app in order to ensure that the subject is properly exposed. When shooting a landscape during sunset, don’t be afraid to try different angles! You can’t really go wrong with a beautiful sunset and some nature.
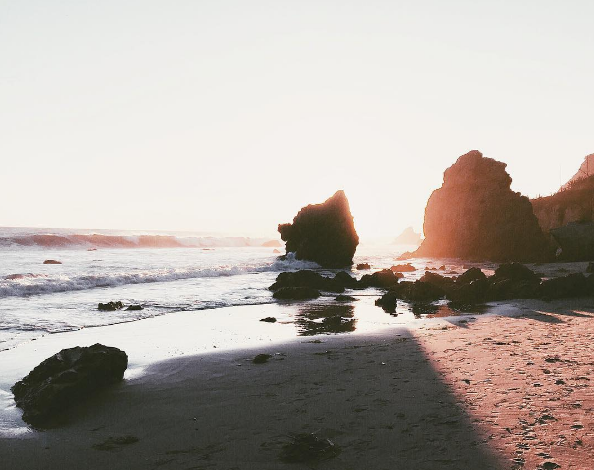
Here’s a photo of the sunset at El Matador, with the sun behind the rocks creating cool beams of light.
Hopefully you have been enjoying and utilizing these iPhone photo tips on lighting, along with the advice from my previous blog. Join us next month when we delve a little deeper into the value of editing your iPhone photos. I’ll be sharing a favorite app of mine to make editing easier. In the meantime, let us know how your photos are going in the comment section below, or share some examples of your own iPhone images!